|
<< Prev
[1]
[2]
Next >>
 |
Step 1
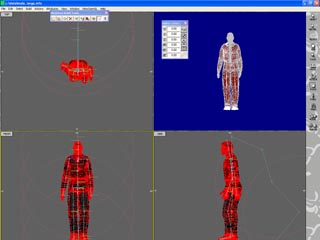
In this tutorial we will use look at one aspect of saving a template motion for a
robot actor so that it can be used and applied in compound character animations.
We will begin with a model of a man that can be made to move using the built in
skeleton. If you look at the image you will see the skelton inside the arms and legs etc.
Note also the skeleton extends beyond the rear of the figure. The purpose of this
skeleton is to allow the figure to turn, pivot, bend rise and fall. In order to
use this model as a robot in the animation we will need to be able to move it in these
ways.
In this tutorial we will make a very short animated sequence that represents the figure
taking one step as part of a walking aniamtion. Once we have the sequence we will save
it as an animated sequence that can be imported and combined.
|
 |
Step 2
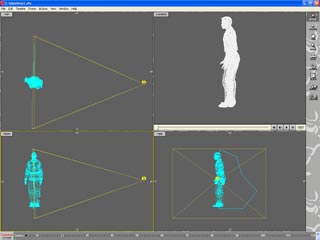
We start by opening the animator and insterting our figure as a robot actor. We are
just going to use this animation to set up the repeat sequence required to make the
man take one step. To do this we will move the camera and the camera target so that we
can see the whole figure from the side. It also might be a good idea to add a second
camera at the front of the man watching how he moves from side to side.
In building a walking sequence there are two aspects that we will need to consider.
Firstly the movement of the man's arms, legs and body. And secondly how the whole
man moves forward as he takes his step. He will also rise up a little as he takes his
steps. To achive this we will need to create key frames for the movement of the man
and for the change of pose of the man.
The walking sequence will requre 30 frames per step. To go through the step will
require 5 keyframes and 5 poses. We will also use 5 keyframes in the movement timeline.
|
 |
Step 3
An important part of the walking action is that the movement (forward) of the figure
as he takes his step matched the movement. (So that he doesn't look like he is
moonwalking!) we find that adding a ground plane and several Target actors can help in
this process.
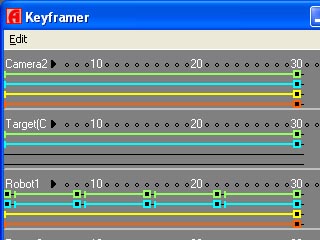
The image in this step illustrates the keyframer with the keyframes for pose and for
position. The main task now is to "Do the Walk". This will take a bit of work and
adjustment and a little artistic skill in 'posing the robot' and positioning it.
To help with this, the tutorial includes post files for each key frame in the
sequence. These files are then used in turn p1.pze,p2.pze,p3.pze,p4.pze,p1.pze (the
last post is the same as the first to allow for cyclic animation.
|
 |
Step 4
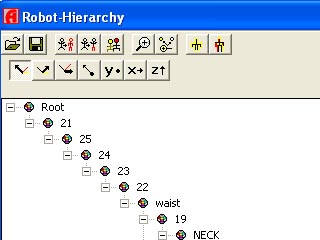
To load the poses, select the Robot actor (click on its hold point) and engage the
vertex tool, this will show the 3D Pose window and the Skeleton Hierarchy view.
Using the hierarchy view the pose for the robot can be loaded for each key frame in turn.
Step through each keyframe using the buttons below the camera window
the pose is loaded into the active keyframe, i.e. that frame is indicated below the
camera window.)
|
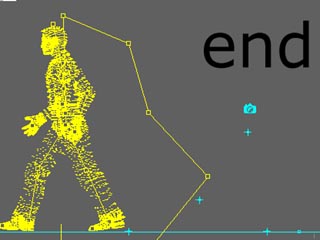 |
Step 5
To get the required movement takes a bit of time and some trial and error. Once the
character's poses look correct, you can move the character in the direction of walk
to get a good looking relationship between the start of the step and the end.
|
Tutorial written by Stuart
<< Prev
[1]
[2]
Next >>
|